


Tidal Mask Replacement Anti-Fog Films x2
Tidal Mask Replacement Anti-Fog Films x2
or make 4 interest-free payments of$5.88 AUDfortnightly with ![]() More info
More info
Couldn't load pickup availability
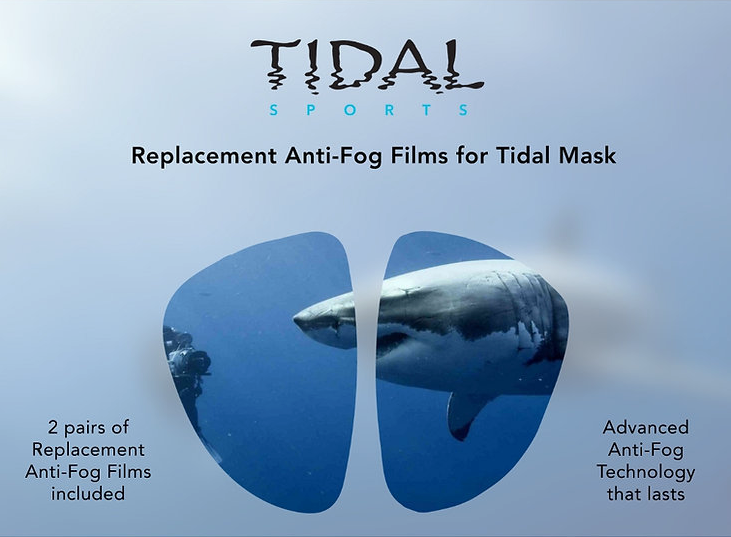
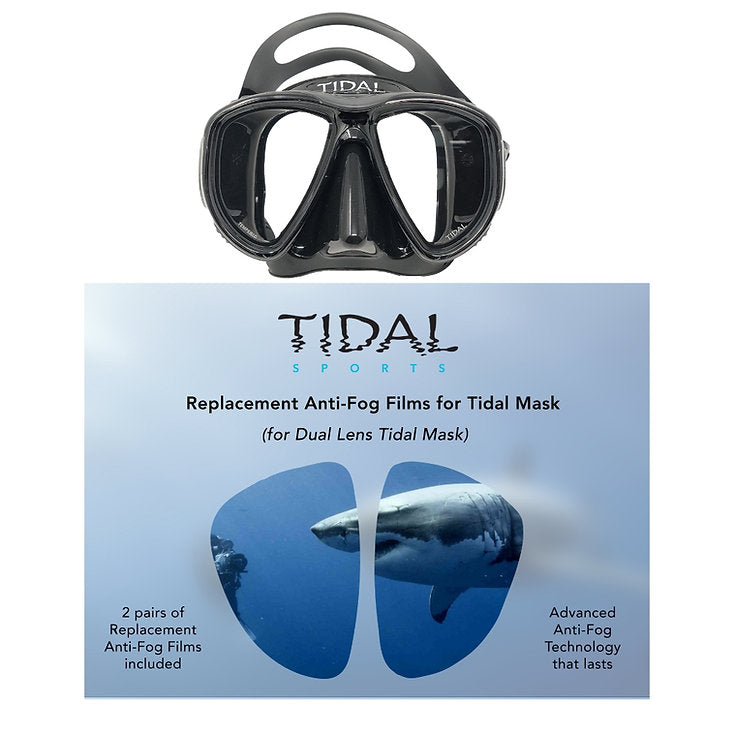
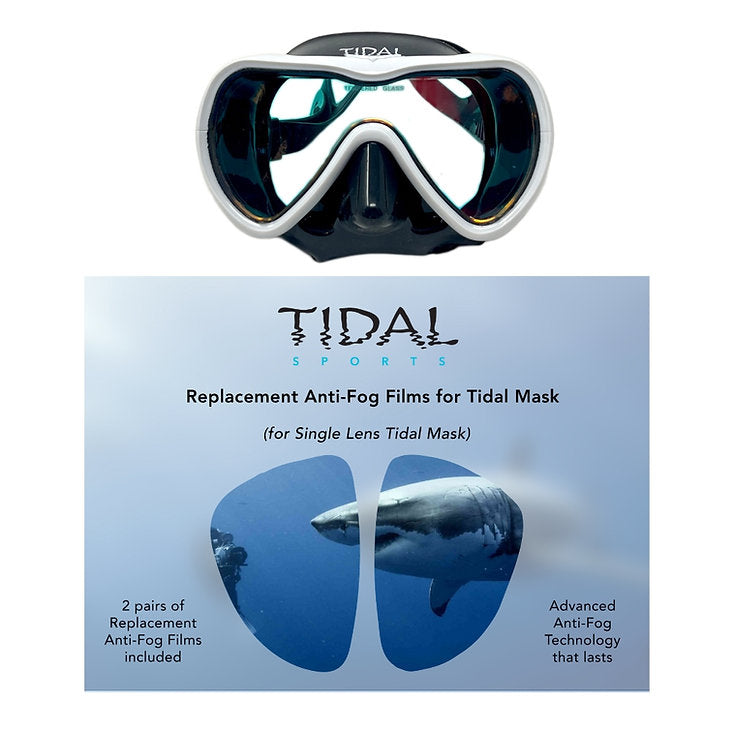

These Anti-Fog Film replacements are perfectly cut to match the style of the Tidal Mask you own. Please select your mask from the drop-down menu to ensure the correct films are sent.
See replacement instructions below and view the video tutorial at: www.proshotcase.com/tidal-sports-gear-instructions
Step 1:
First, peel off the old anti-fog film that is adhered to the inside lens. You may need to use your fingernail to get under the film. Lift it upwards and peel it off the lens.
Step 2:
Next, thoroughly clean the lens. You can use any standard glass cleaner or soap and water. Use a soft cloth (clean t-shirt works great) to dry and make sure there are no dust particles on the lens. Do not use paper towels or tissue paper as these can leave dust particles behind.
Step 3:
Prepare the new anti-fog film. Make sure to use the correct film for the correct lens. They are labeled left and right as if you are looking through the mask. The green tabs will be positioned on the top inside the lens (the bridge of the nose!)
Step 4:
Peel the new film off of the base layer. Make sure NOT to pull the green tab as this is a protective covering that will not be removed until the end. Tip: Try not to touch the adhesive side of the film if possible.
Step 5:
Carefully align the new film on the lens. Make sure there is a little space around the entire perimeter of the film before you let go! Once the film is in the proper position let go and it will adhere to the lens.
Step 6:
Use a cloth to massage out any air bubbles. If the lens was fully cleaned you should be able to easily remove any bubbles after the application.
Step 7:
Once you are ready to use your mask in the water, make sure to pull the green tab to remove the protective layer. Enjoy your fog-free Tidal Mask for months!